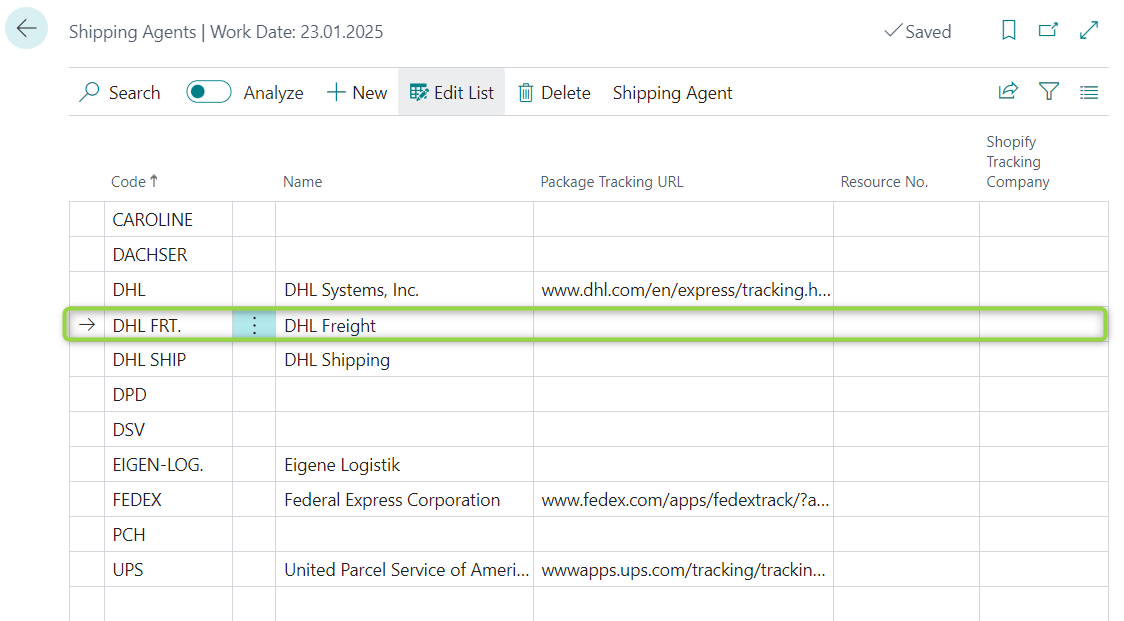
Open the page "Shipping Agents"
Enter the code and name of the shipping agent
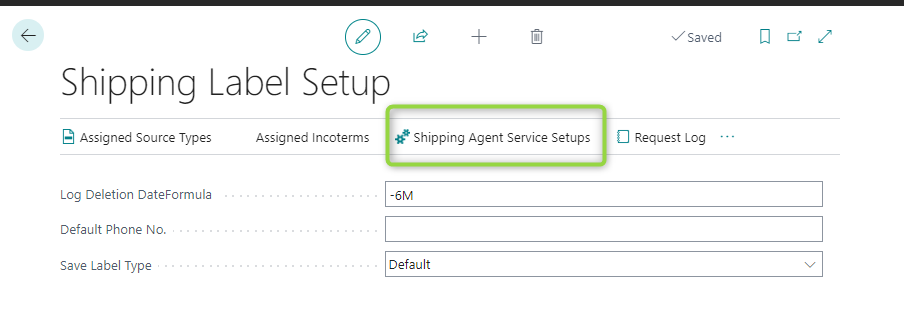
Open the page "Shipping Label Setup"
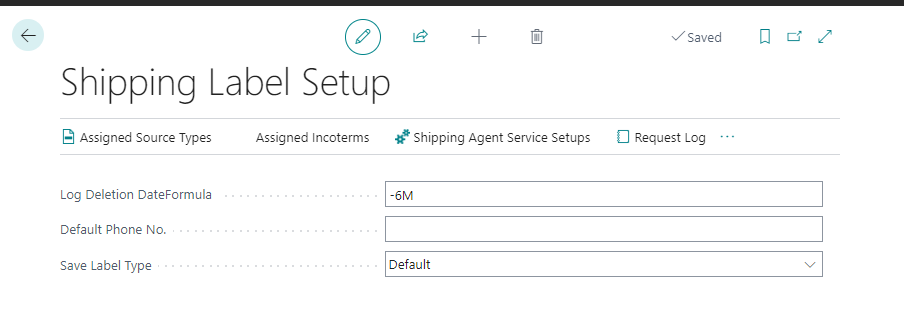
Click on "Shipping Agents Service Setups"
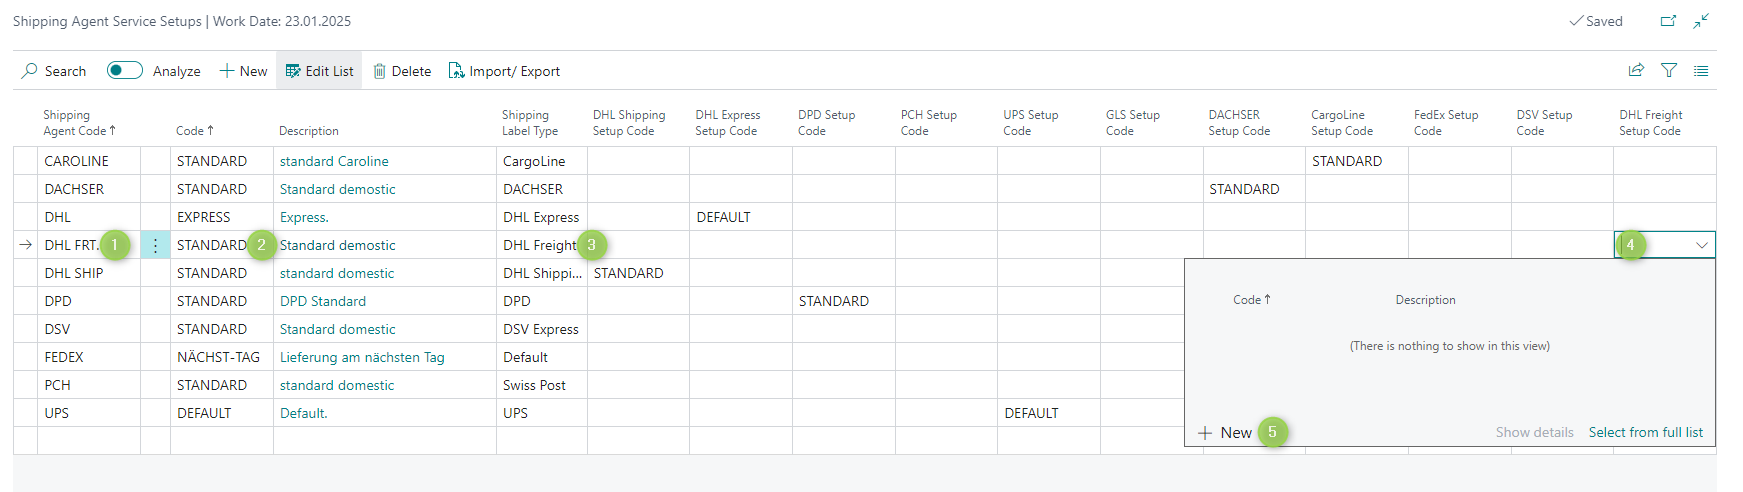
(1) Choose the Shipping Agent. Only the shipping agents that were defined in Step 2 can be chosen. (2) Define a code (Sub-process 1). Please note that this code defines only the delivery time. The user must combine this code with the setup code, which is defined in step 6 because the setup code defines how to deliver. (3) Choose the Shipping Label Type for the Shipping Agent so that BC understands for which shipping agent should the shipping label be printed. (4) Click on the field of Setup Code of the corresponding Shipping Agent (5) Click on "New". A DHL Freight Setup page will be opened.
If it is the very first setup, the Product Settings will be opened automatically. It shows that the product settings are not done. The users have two options:

The user defines the specific product or service that will be used through step 6. This information will be attached to related documents, for example, the sales order, once the BC user chooses a defined code from Shipping Agents Service Setups.
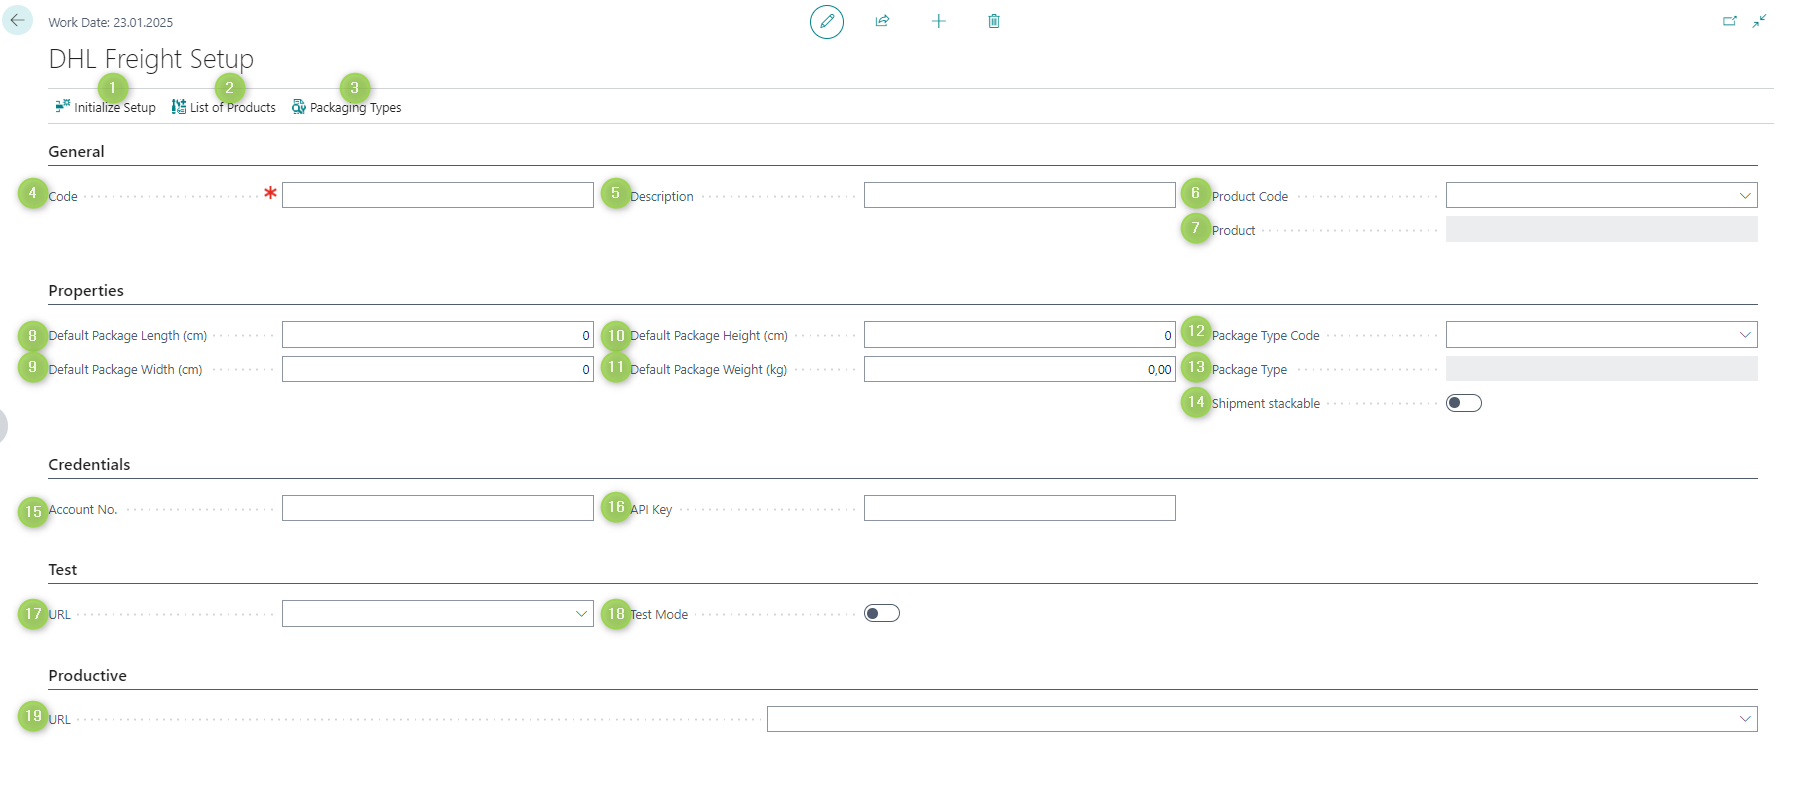
(1) "Initialize Setup" provides the users with some default information for setup as a recommendation. If the user does not use this function, he must then fill in everything himself. (2) Add a product list (Sub-process 2). (3) Add package types (Sub-process 4). (4) Enter the Code. Here the user can enter any desired code for his convenience. (5) Add a description for the code. Here the user can enter any desired description for his convenience. (6) Choose a product code. Only the product codes that are added in product list (see Sub-process 2) can be chosen. (7) This field displays the product description automatically after a product has been chosen. (8) Fill in the default package length in cm.
(9) Fill in the default package width in cm.
(10) Fill in the default package height in cm.
(11) Fill in the default package weight in cm.
(12) Choose a package type. Only the package types that are added in the package types (see Sub-process 4) can be chosen.
(13) This field displays the package type description automatically after the package type is chosen. (14) This toggle defines whether the packages are allowed to be stacked.
(15) Fill in the account no.
(16) Fill in the API Key.
(17) Choose the test URL.
(18) This toggle is used to activate the test mode. Once the test mode is activated, the productive URL cannot be used. (19) Choose the productive URL.